I finally delivered this quilt to the baby I made it for, so I can blog about it now! I actually even had it made *before* said baby was born, but covid+everything meant I was only able to deliver it today, but the baby is only about 3 months, so honestly I think that’s pretty timely in the terms of handmade gifts.
ShipShapeQuilt_1.jpg
ShipShapeQuilt_2.jpg
ShipShapeQuilt_3.jpg
ShipShapeQuilt_4.jpg
ShipShapeQuilt_5.jpg
ShipShapeQuilt_6.jpg
Pattern

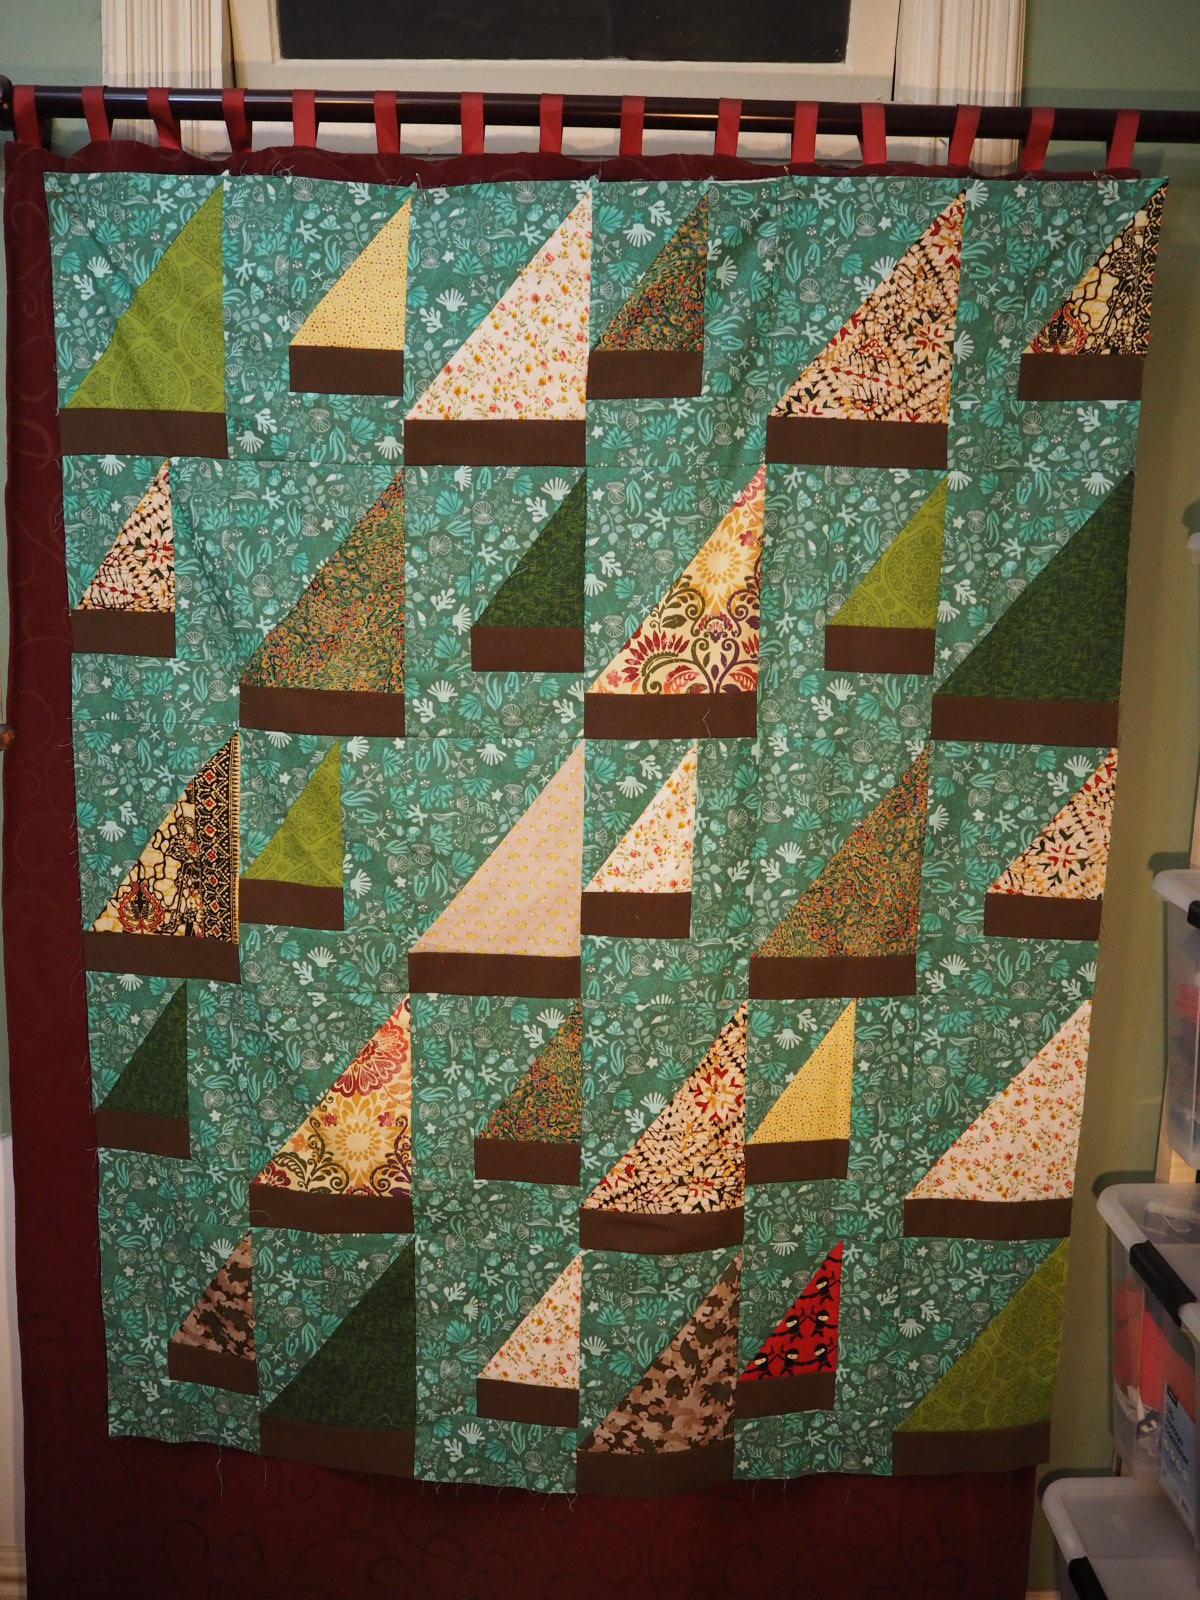
Ship-Shape by Alice Kennedy, quilt by Lucy A. Fazely - Lap Quilt size (c. 52" x 64") - found here: http://quiltinspiration.blogspot.com/2012/07/free-pattern-day-sailboats.html
Fabric
The boat sails were from my quilting remnants stash (it is possible to look on there and identify a number of other garments or projects, in particular the cushion I made in Introduction to Quilting).
The water background was bought new for this project online from the Bellarine Sewing Centre.1
The backing was bought new for this project from Spotlight, as was the batting (50% bamboo/50% cotton blend).
The binding is quilting cotton from Spotlight that used to be a Tilly and the Buttons dress, but I took it apart for use in other things.
Piecing process
For piecing, I mostly used grey Rasant thread, because grey goes with everything, and pieced using my Pfaff 1222 which is still my favourite machine. For the borders, I used black all-purpose Gütermann thread because I was trying out my treadle Singer 66 and that’s what I had wound the bobbin with. I think the treadle piecing is comparable to the Pfaff piecing. There’s no backstitch available on the Singer 662 but I don’t think that makes a ton of difference, since I was chain piecing anyway.
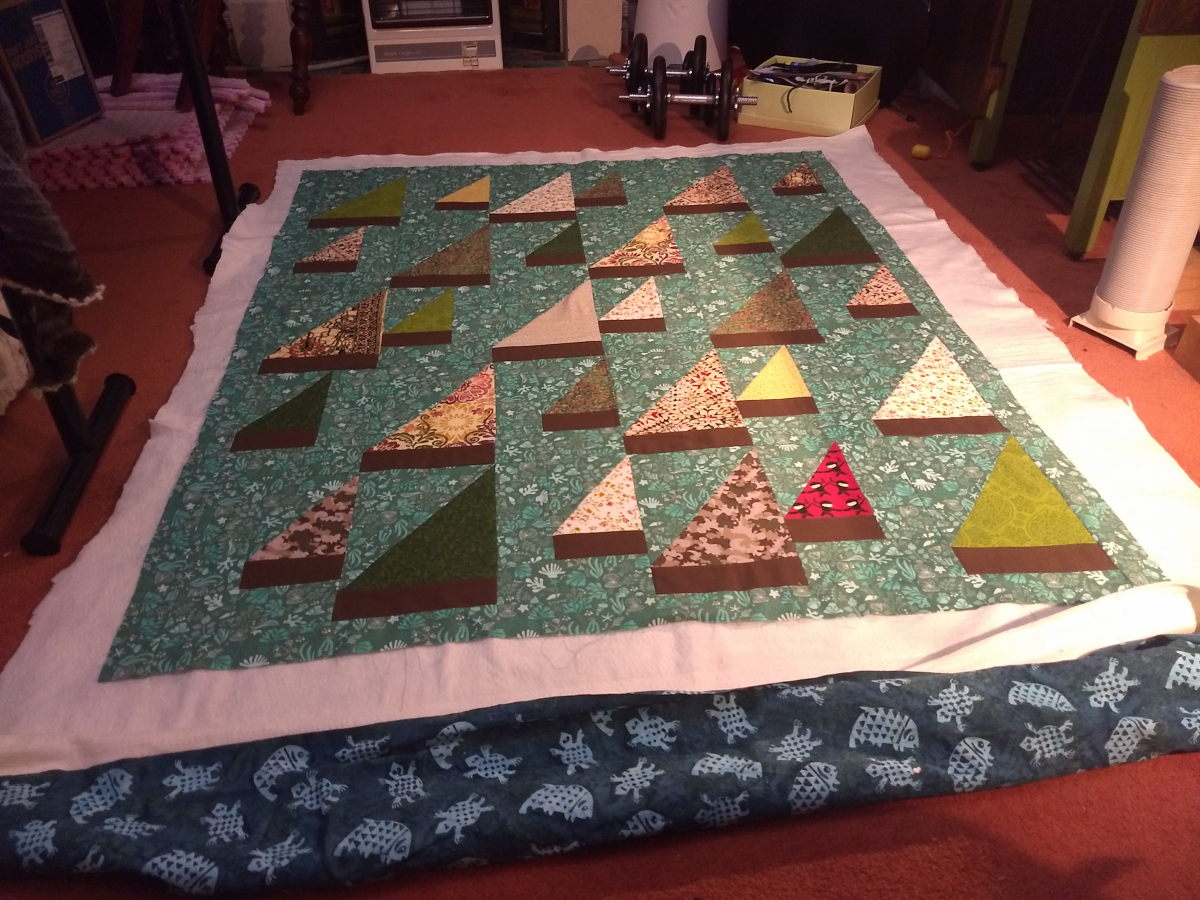
Sandwich process
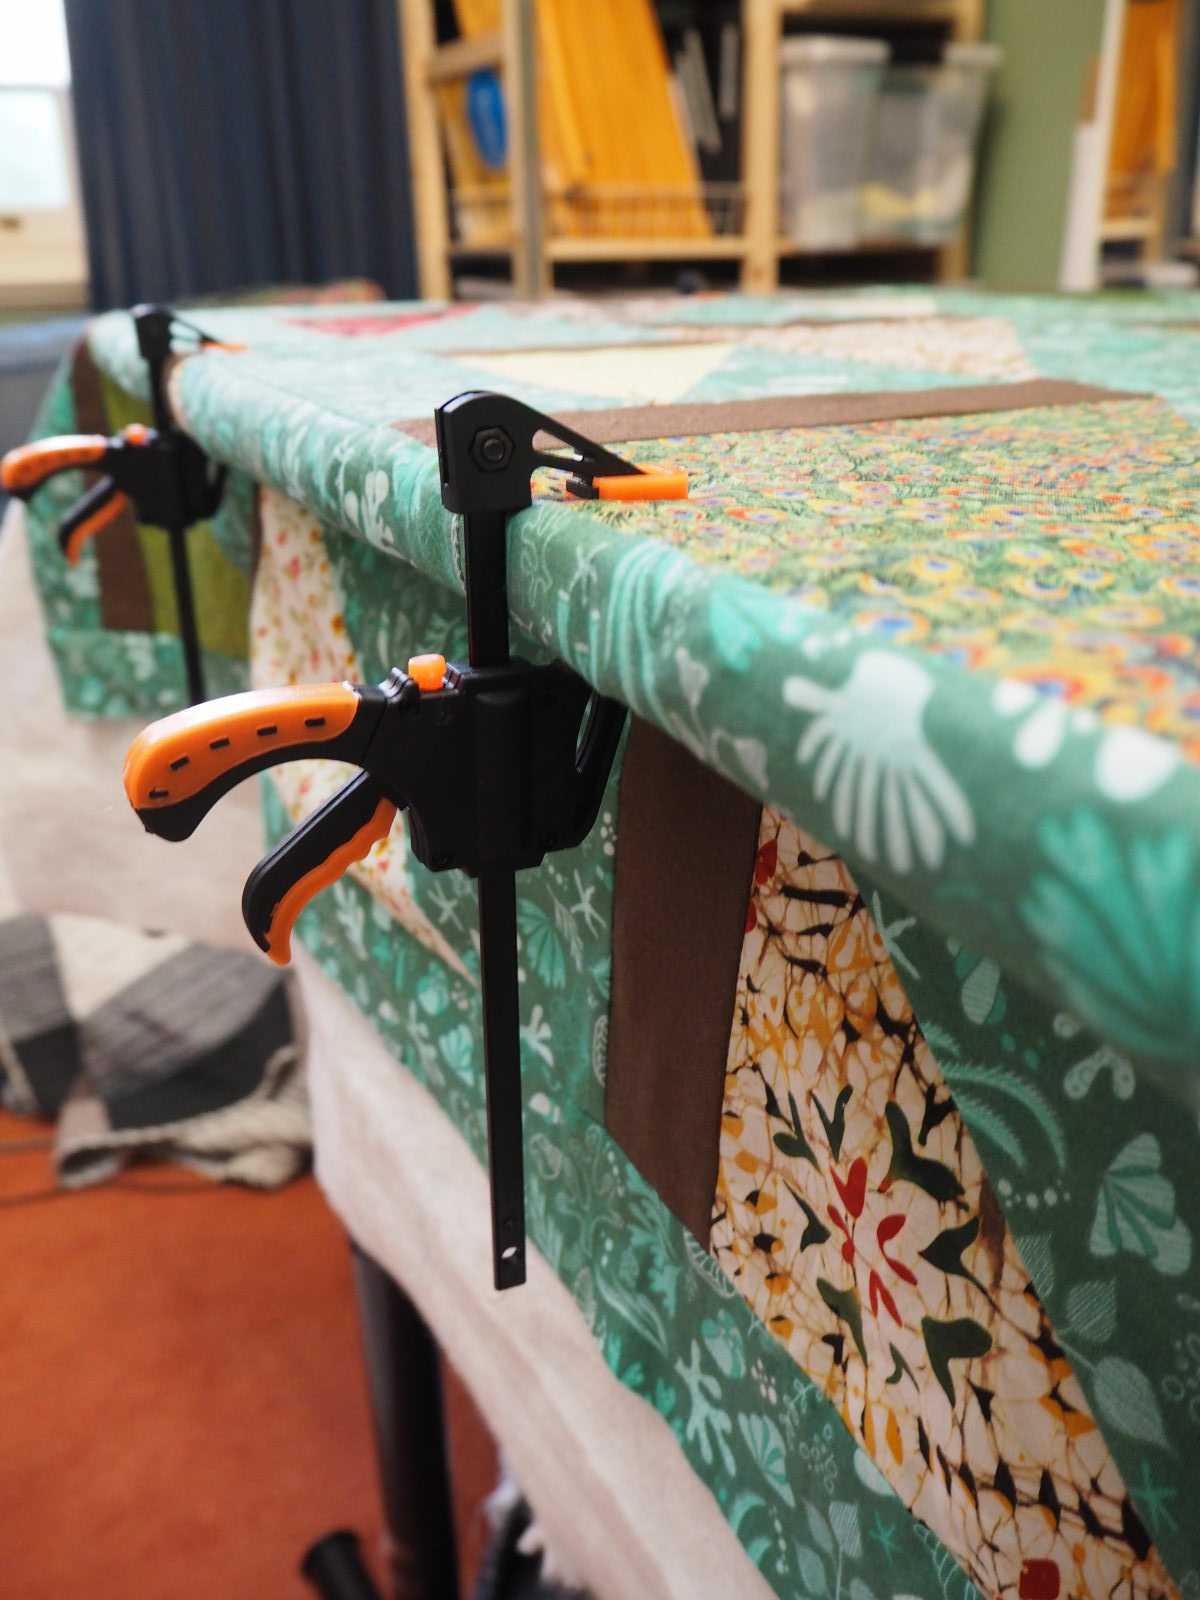
I started off doing the sandwich process just on the floor, but then I wasn’t sure if I was getting it done properly, so I did some googling and found an option for sandwiching that seemed (and was) much easier. The basis principle is that you mark a raised cross in the middle of a table (I taped down some pencils; the tutorial I watched used kebab skewers), then mark the vertical and horizontal centre of each layer of the quilt sandwich, then put each layer on the table, matching up with the marked centre cross (which you can feel through the fabric) clipping the layers to the sides of the table as you go.
This was the tutorial I watched (I think the captioner could have used less sass, personally.) – https://www.youtube.com/watch?v=jnke_KzeTI8
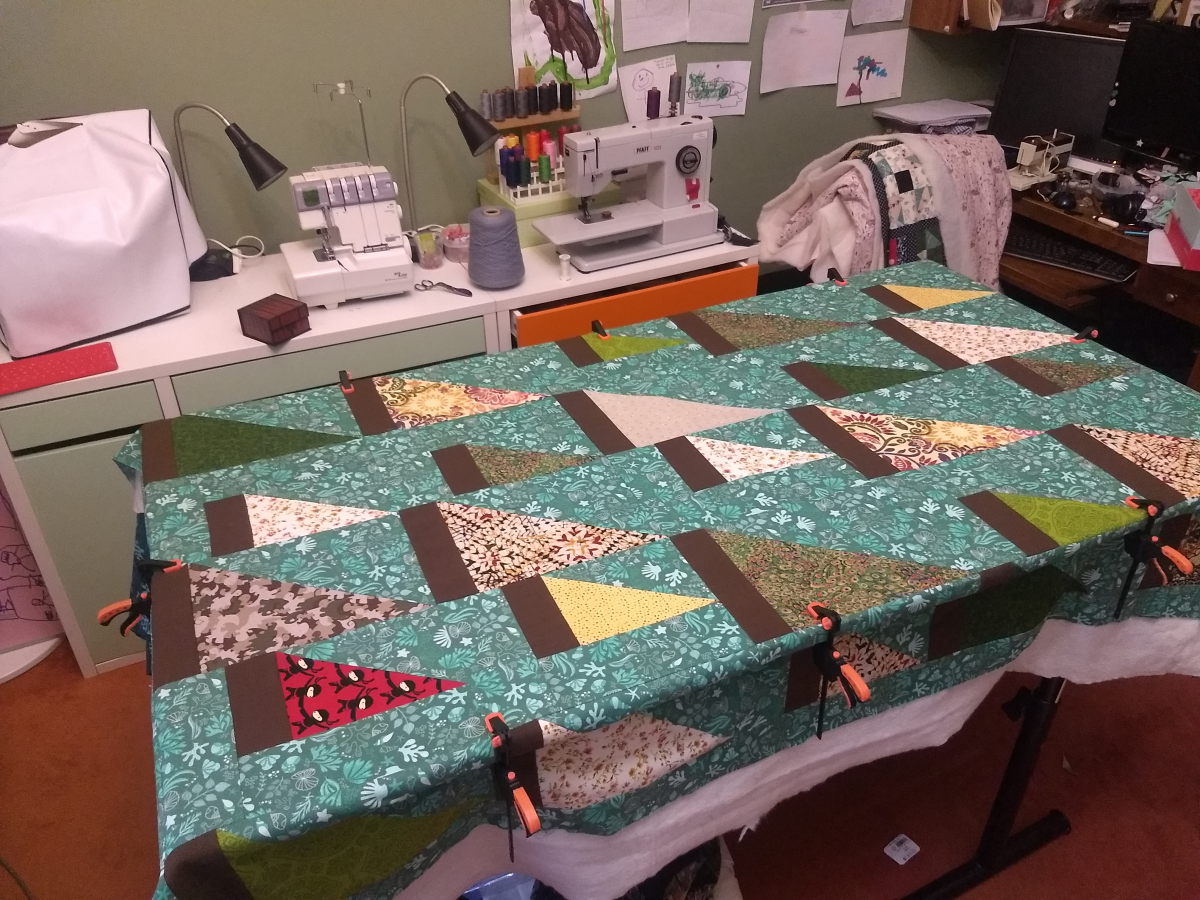
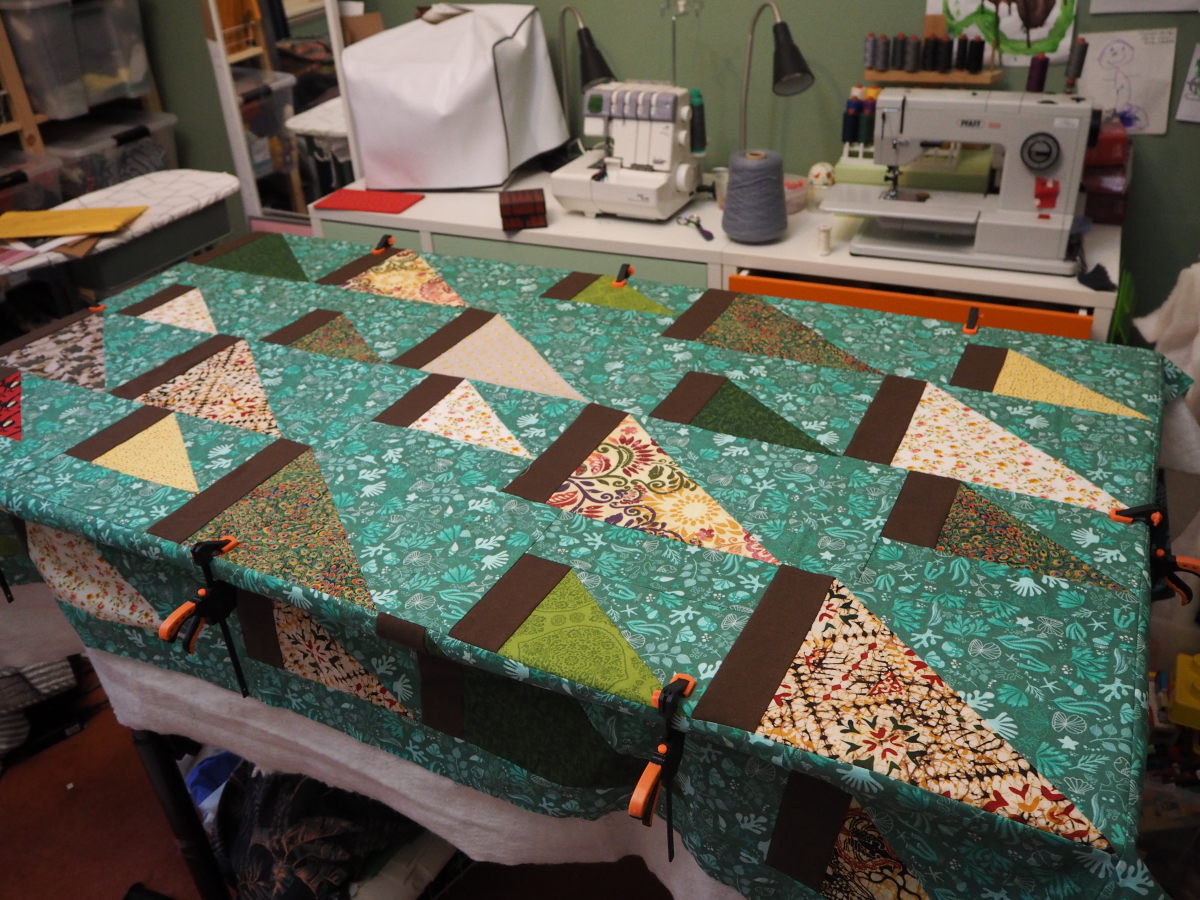
It was all relatively painless, and doing it all on my all-purpose-but-mostly-cutting table was much more spine-friendly. Can recommend. I did have to go to Bunnings and buy some clamps, which I used instead of binder clips3 because my table is relatively thick, so I figured that clamps would be more functional. I went with clamps rather than clips, because the clips required a *lot* of grip strength to operate.
Quilting
This was my first proper quilting project, so the actual quilting was a bit of a learning experience. I really wanted to try quilting on my Singer 66 treadle machine (because it was new-to-me, shh, but also because it’s classic straight stitch stuff) but I was having too much trouble with the differential feed and I didn’t have a walking foot for that machine. I ended up mostly using my Pfaff 1222 because of the IDT4 and because it’s my favourite.
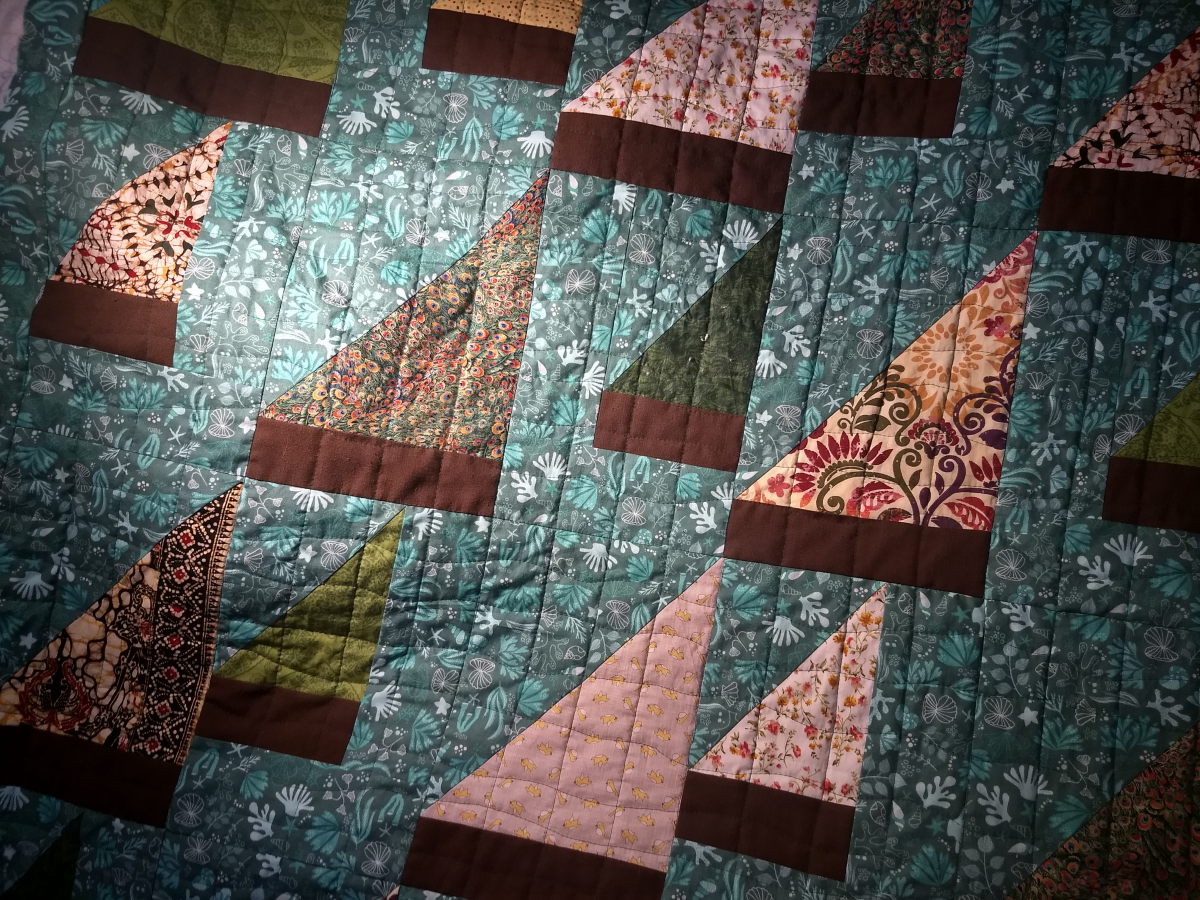
The quilting ‘pattern’ was stitch-in-the-ditch vertically and horizontally along the sides of the individual blocks.
I then filled in the vertical gaps with straight lines 2" apart. This posed more of a problem because my Pfaff 1222 does not have an IDT foot with a quilting guide. I switched over to my other Pfaff (2038) because it had an IDT foot with a quilting guide, but I just don’t like the machine as much and it doesn’t feed as evenly, so I switched back again and jury-rigged a 2" quilting guide with a paper clip.
That was all mostly fine, but the horizontal gaps required more thought. The best width to use was 3", because of the nature of the two different blocks. However, I couldn’t jury-rig a 3" paper clip guide (or other sorts of wire) because it was just too unwieldy and wasn’t secure, and the quilting guide on my other Pfaff didn’t actually extend that far. I did a lot of googling about DIY quilting guides and came up with very little. Then I considered eyeballing it, but that was honestly never going to work. My eventual solution was to quilt with wavy lines, because then I didn’t have to be as accurate, but it would also be fine because wavy lines are reminiscent of the sea and are therefore thematic.5
It didn’t take that long and wasn’t too unwieldy to get through the machine, so that was nice. I did find that I really needed to restrict the amount I did per evening, because it’s a type of sewing machine use that really stresses out my neck/shoulders/upper back.
Finishing
I used 2.5" wide binding strips cut on the crossgrain and then sewn together to form a single long strip of binding, which was then folded in half lengthways and pressed. I sewed the binding to the front of the quilt using a 1/4" seam allowance, and doing the thing where you sew to 1/4" before the end, then folding the binding upwards and down again, then starting on the next edge from 1/4" into the edge. (It was kind of weird and I was confused, but it seemed to come out ok? I’d probably do a different mitering technique next time.) Then I folded over the binding to the back, and stitched in the ditch on the front to sew down the binding on the back. I only had to go back and redo a few sections because I missed the binding.
I did read a technique where you sew the first pass of the binding to the back of the quilt, because then when you fold over the binding for the second pass, you can just topstitch from the front and you don’t have to worry about catching the binding on the other side, and if you have a suitably busy backing, the bobbin thread won’t be that noticeable. I think I will try that next time.
Because this is a gift for a friend’s baby, I washed the finished quilt on standard cottons wash at 40C and line dried it. It seemed to turn out fine, although I did get a bit of bearding through some of the boat fabrics. Unfortunately, there was a tissue in the wash, so it was sometimes hard to tell if the lint was from the quilt or not. I washed it again for luck and got most of the bearding off with the sticky tape lint removal technique.
Conclusion
First quilt! Pretty happy!
-
Isn’t that a fairly random fabric supplier, I hear you ask? Well, yes, I was searching for a particular quilting cotton with possums on powerlines because IG@katiemakesadress made something out of it and it was such a cool fabric, but it was out of stock basically everywhere except this place. And since I was ordering from a quilt shop, I got a suitably themed background fabric on special at the same time. ↩︎
-
This function was added in later models but is not on the one I have. ↩︎
-
Binder clips are hard to buy online, because they are extremely inconsistent about telling you how much capacity a clip has - the measurement given often appears to be the height of the actual clip or the width of the clip, which is not the same thing. ↩︎
-
That’s the built in walking foot that Pfaff has. ↩︎
-
Amount of bold reflects how excited I was to realise that I could get away with a bit of a fudge AND justify it!!! ↩︎